

Latest News
Victron Home Assistant Setup: Ultimate Energy Automation
Jan
Setting Up Victron with Home Assistant
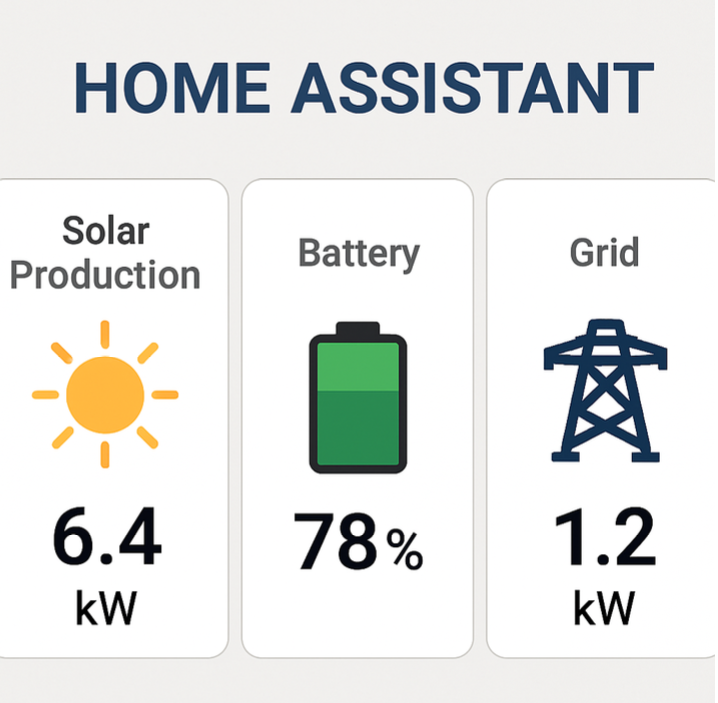
Tired of juggling apps to manage your energy? Checking the Victron VRM portal, then a weather app, then your Home Assistant dashboard creates a fragmented view of your home’s status. What if you could see your live solar production, battery percentage, and grid consumption on one single screen, right next to your other smart devices?
A proper Victron Home Assistant setup achieves this, creating a command centre for your home, RV, or boat. It transforms scattered data points into actionable intelligence, allowing for powerful automations like getting a notification the moment you lose shore power or automatically shutting down non-essential devices when the battery is low. This guide will walk you through connecting these two systems to build the ultimate Victron energy dashboard in Home Assistant.
Your Pre-Flight Checklist: What You Need to Get Started
To ensure a smooth setup, let’s confirm you have these key items ready. This will make the rest of this Home Assistant Victron integration a rewarding experience.
Here’s what you’ll need:
- A Victron GX Device (e.g., Cerbo GX, Ekrano GX)
- A running Home Assistant instance (e.g., on a Raspberry Pi, Home Assistant Green)
- Both devices connected to the same local network
- The IP Address of your Victron GX device
That last item is the most critical. The IP address acts as your GX device’s unique address on your home network, allowing Home Assistant to find it. You can typically locate this on the Victron’s screen under Settings > Network, or by looking through the list of connected devices in your Wi-Fi router’s settings. Once you find it (it will look something like 192.168.1.55), keep it handy for the next step.
How Victron and Home Assistant Talk: A Simple Guide to MQTT
Home Assistant and Victron can’t talk to each other directly; they need a common language. For this, we’ll use a highly reliable method called MQTT. Think of it as the go-to communication standard for smart devices, making the victron mqtt home assistant connection seamless.
MQTT works like a digital post office. Your Victron system sends out constant updates—like “Battery is at 85%”—as tiny data packets to a central hub called an MQTT Broker. The broker’s job is to receive these messages and hold them for pickup.
The Home Assistant Integration acts as a specialised translator. It “subscribes” to the broker and, when a new message from Victron arrives, translates it into useful sensors that Home Assistant can display and use. Many consider this the best victron home assistant integration method because it is more modern and straightforward than older alternatives like victron modbus tcp home assistant.
In short: Victron sends the data, the broker directs it, and the integration translates it. Let’s begin by turning on this “data radio” on your Victron system.
Step 1: Enable the “Data Radio” on Your Victron System
Before Home Assistant can listen, your Victron system needs to start broadcasting. Using your GX device’s touchscreen or the Remote Console, navigate to the main menu, find Settings, then scroll down and select Services. This is the first step for any victron cerbo gx home assistant integration.
Inside the Services menu, scroll until you see the MQTT section. Find the option labelled “MQTT on LAN (Plaintext)” and turn the toggle switch on. While “Plaintext” might sound concerning, it is perfectly safe for this setup. It means the data isn’t encrypted, which is fine because it will only travel within your secure private home network, never over the open internet.
That’s all you need to do on the Victron side. Your system is now broadcasting its status updates. The next step is to give Home Assistant a “radio receiver” so it can tune into that signal.
Step 2: Set Up the “MQTT Post Office” Inside Home Assistant
With your Victron system broadcasting, it’s time to give Home Assistant the tool it needs to listen. We’ll use a Home Assistant “Add-on,” a specialised app that gives your system a new capability. For this home assistant victron guide, we are building a digital post office inside Home Assistant to receive all the data from your Victron gear.
Navigate to Settings > Add-ons from your main Home Assistant menu and click the blue ADD-ON STORE button. In the search bar, type “Mosquitto” and select the official “Mosquitto broker” result.
On the add-on’s page, click INSTALL and wait for it to complete. Before proceeding, enable the “Start on boot” toggle switch. This crucial step tells the post office to open automatically whenever Home Assistant starts. After that, click START.
Your MQTT broker is now running. The final piece of the puzzle is to install the “translator” that allows Home Assistant to actually read the data from your Victron system.
Step 3: Connect the Dots with the Official Victron Integration
The “post office” (MQTT broker) is running, but Home Assistant still needs a “translator” to read the Victron-specific mail. This final step is handled by a Home Assistant Integration. Navigate to Settings > Devices & Services, click the blue + ADD INTEGRATION button, and search for “Victron”. This is how you integrate victron with home assistant; the integration handles all complex communication behind the scenes.
Upon selecting the Victron integration, a configuration window will appear asking for the IP address or hostname of your GX device. Enter the IP address for your victron cerbo gx home assistant connection (e.g., 192.168.1.55) and click Submit. It will automatically find the Mosquitto broker you just installed.
Once you submit, the integration connects to your GX device and automatically creates a new Device in Home Assistant representing your Victron system, along with dozens of individual sensors called Entities—like Battery State of Charge, Solar Power, and Grid Consumption.
Your First Win: See Your Victron Battery Status on a Dashboard
Now we turn that raw data into useful information. Let’s bring your battery’s State of Charge (SoC) front and centre so you can see it at a glance.
Navigate to any dashboard in Home Assistant, click the three-dot menu in the top-right corner, select “Edit Dashboard,” and then click the blue “+ ADD CARD” button. Use the search bar to find your battery entity by searching for “battery” or “SoC”.
Once you select your battery entity, Home Assistant will suggest ways to display it. For a percentage, the Gauge card is a fantastic choice, giving a clear visual representation. This is the first step to effectively monitor victron battery with home assistant. You can even customise the colours for different levels (e.g., green for full, red for critical).
Click “Save,” and your first tile is now on your home assistant victron dashboard. This same process works for any data your system provides, from solar production to the AC load. For a complete overview, however, Home Assistant has a dedicated tool.
Go Pro: Use the Home Assistant Energy Dashboard for a Full Picture
A single battery gauge is a great start, but the purpose-built Energy Dashboard offers a complete command centre. It acts like a financial statement for your power, showing exactly where every watt is coming from and where it’s going. This is the key to a truly holistic view.
To set this up, navigate to Settings > Dashboards and select Energy. This special dashboard will ask you to assign your sensors for grid, solar, and battery systems. This connects your Victron data to the victron energy dashboard home assistant was designed for.
Finding the right entity can be tricky, so here’s a cheat sheet. In the configuration screen, make these connections:
| Category | Victron Entity to Use |
|---|---|
| Grid Consumption | Grid L1 Power |
| Solar Production | PV Power |
| Battery Systems | Battery Power |
Once configured, let it gather data for a couple of hours. You’ll be rewarded with a rich graph showing the dynamic flow of energy through your home, allowing you to see solar production covering your daytime usage and how much grid power you’ve avoided.
Make It Smart: Create Your First Victron Automation (No Code!)
Seeing your data is insightful, but making your home react to it is where the real power lies. This is done with Automations—simple “if this, then that” recipes. We’ll start with a practical example: getting a notification on your phone when your battery gets too low.
An automation has two parts: a Trigger (the “if”) and an Action (the “then”). Our trigger will be the battery’s State of Charge (SoC) dropping below a certain level, and the action will be sending a notification to your phone.
To build this, navigate to Settings > Automations & Scenes and create a new, blank automation. For the Trigger, select “Numeric state” and choose your battery’s SoC entity. Set it to trigger when the value is “below” 20. Next, under Action, choose “Call service” and find the notification service for your phone (e.g., notify.mobile_app_your_phone_name). In the message box, type something clear like, “Warning: Battery is low!” Save it, and you’re done.
You’ve just created your first piece of smart energy logic. This same process is the foundation for everything else, from turning off non-essential loads to more advanced victron multiplus home assistant control.
You’ve Done It! What’s Next?
You’ve successfully bridged the gap between your powerful Victron energy system and your smart home, creating a single, unified dashboard from previously separate apps. This setup complements, rather than replaces, your Victron VRM portal. Think of it this way: VRM is for historical analysis and official remote management, while Home Assistant is for real-time local automation involving your entire smart home.
With this new connection, the possibilities for home assistant victron automation ideas are nearly limitless. Imagine your house automatically shedding non-essential loads when the battery is low, or having your Victron MultiPlus Home Assistant control prioritise solar for charging an EV on a sunny day.
Your home’s energy system is no longer just a utility—it’s an active part of your smart home. By bringing it into Home Assistant, you’ve unlocked a new level of resilience and intelligence, empowering you to create a more responsive and efficient home.
Contact Us
If you have any questions or need assistance in selecting the right kit, please don’t hesitate to reach out to us –
Phone – +44 1452 699300
Email – info@energymonkey.co.uk
Address – Unit 2 Huntley Business Park, Gloucester, GL19 3FF, United Kingdom
Stay Connected
Follow us on social media to stay updated on the latest products, news, and promotions –
Facebook – Energy Monkey Ltd
Instagram – @energymonkey.co.uk
LinkedIn – https://www.linkedin.com/company/energy-monkey
Twitter – https://x.com/EnergyMonkey2
Youtube – https://www.youtube.com/channel/UCRuqb3XL5vR31kS-r5IXfMQ